LED and animation
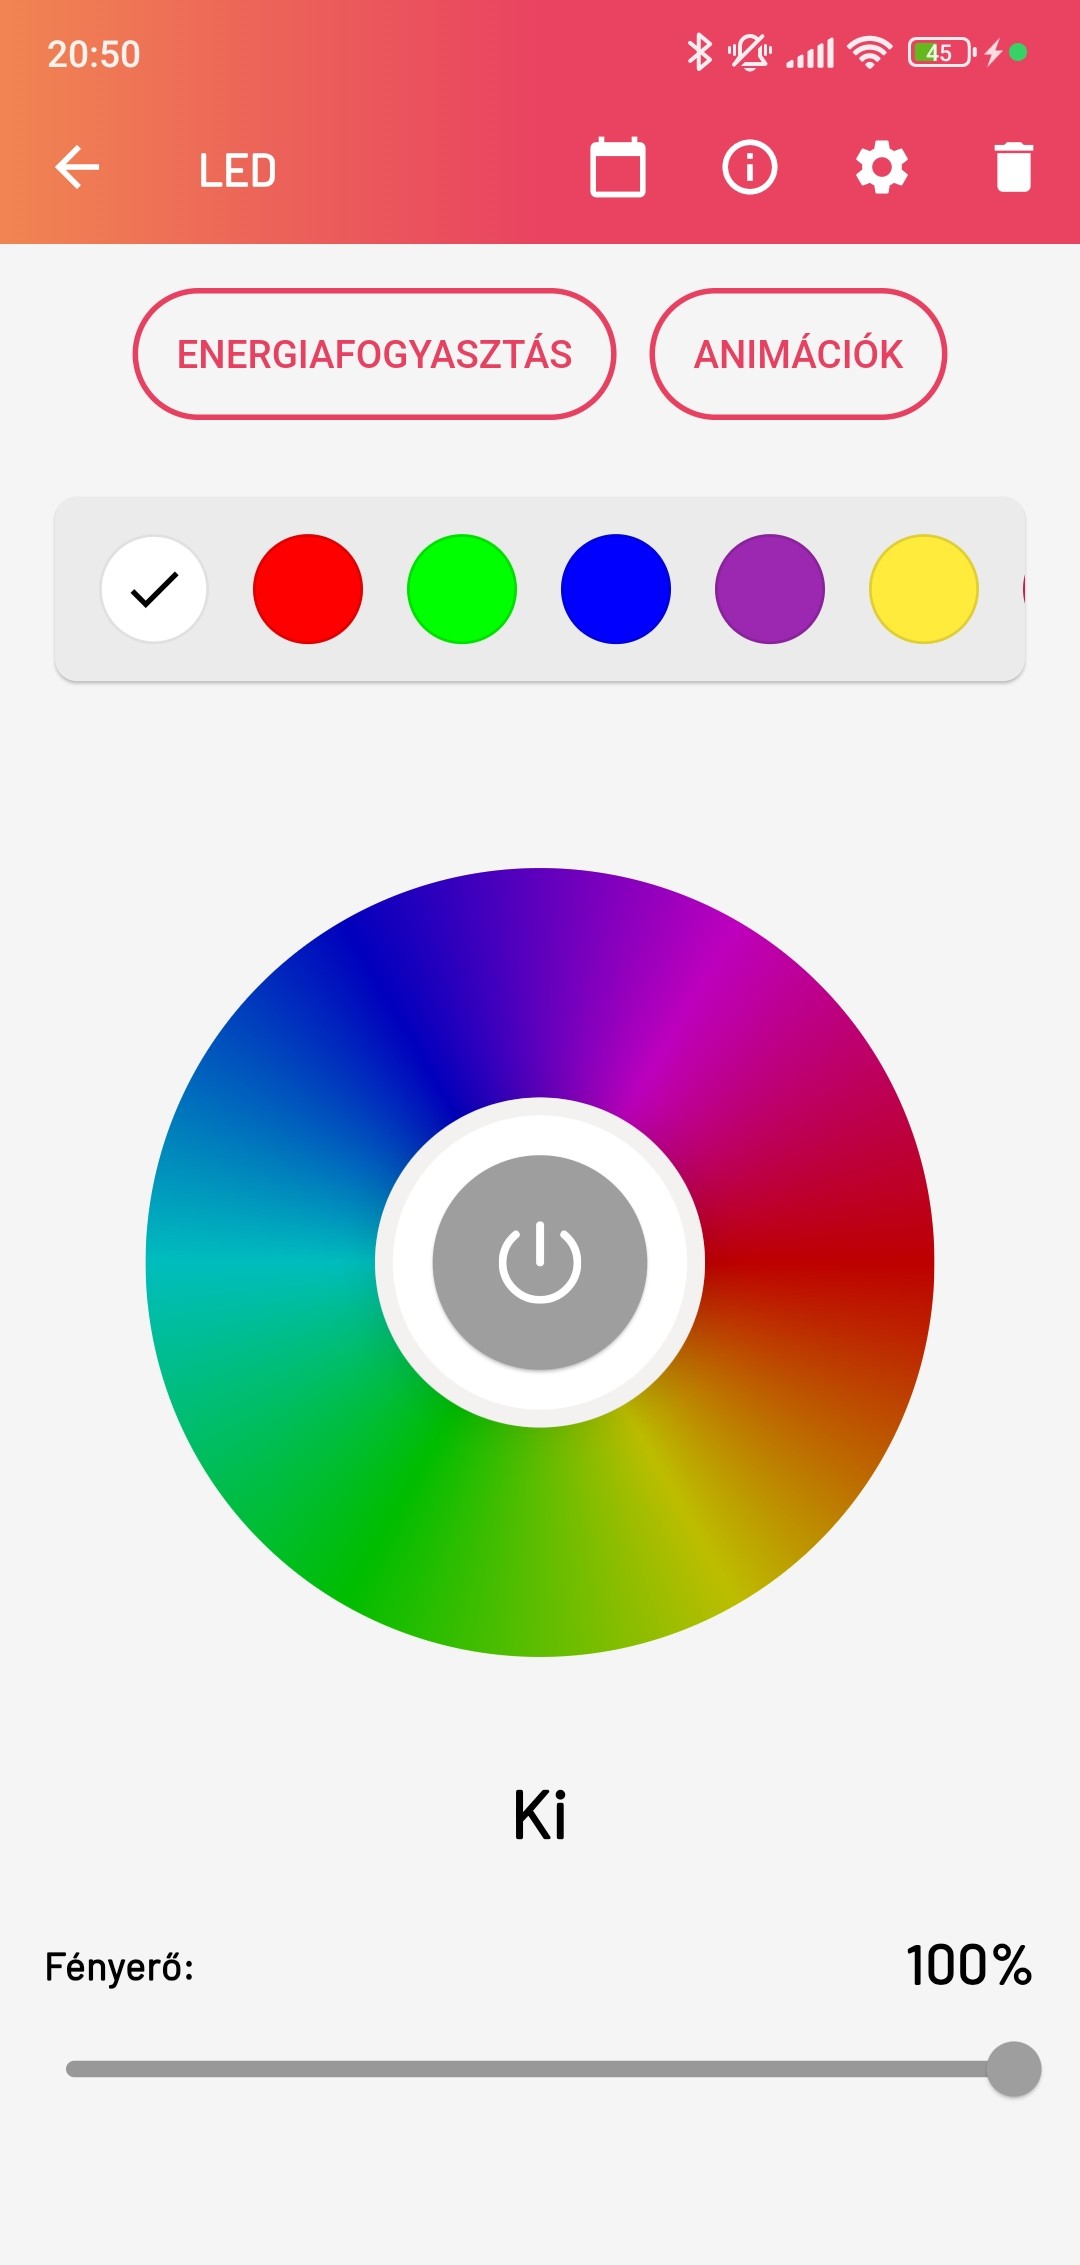
To play an animation on an LED strip, you first need to select an LED strip already created in Smartive in the current room. If you tap it, the app navigates us to the LED strip screen. On the top navigation bar you find menu items such as:
- LED automations
- LED information
- Device setup
- Delete
Further down there are two buttons, Energy consumption and Animations. Tapping Energy consumption shows the device energy-consumption chart broken down into daily, monthly, yearly and all-time periods. Below that, on a vertically scrollable list, we can switch among predefined colours; selecting them makes the LED strip light continuously in that colour; in the middle of the screen is the colour wheel, where we can pick any colour, and the LED strip immediately switches to the selected colour, as well as the On/Off switch. At the bottom of the screen we can set the LED strip brightness between 1–100%.
Animation
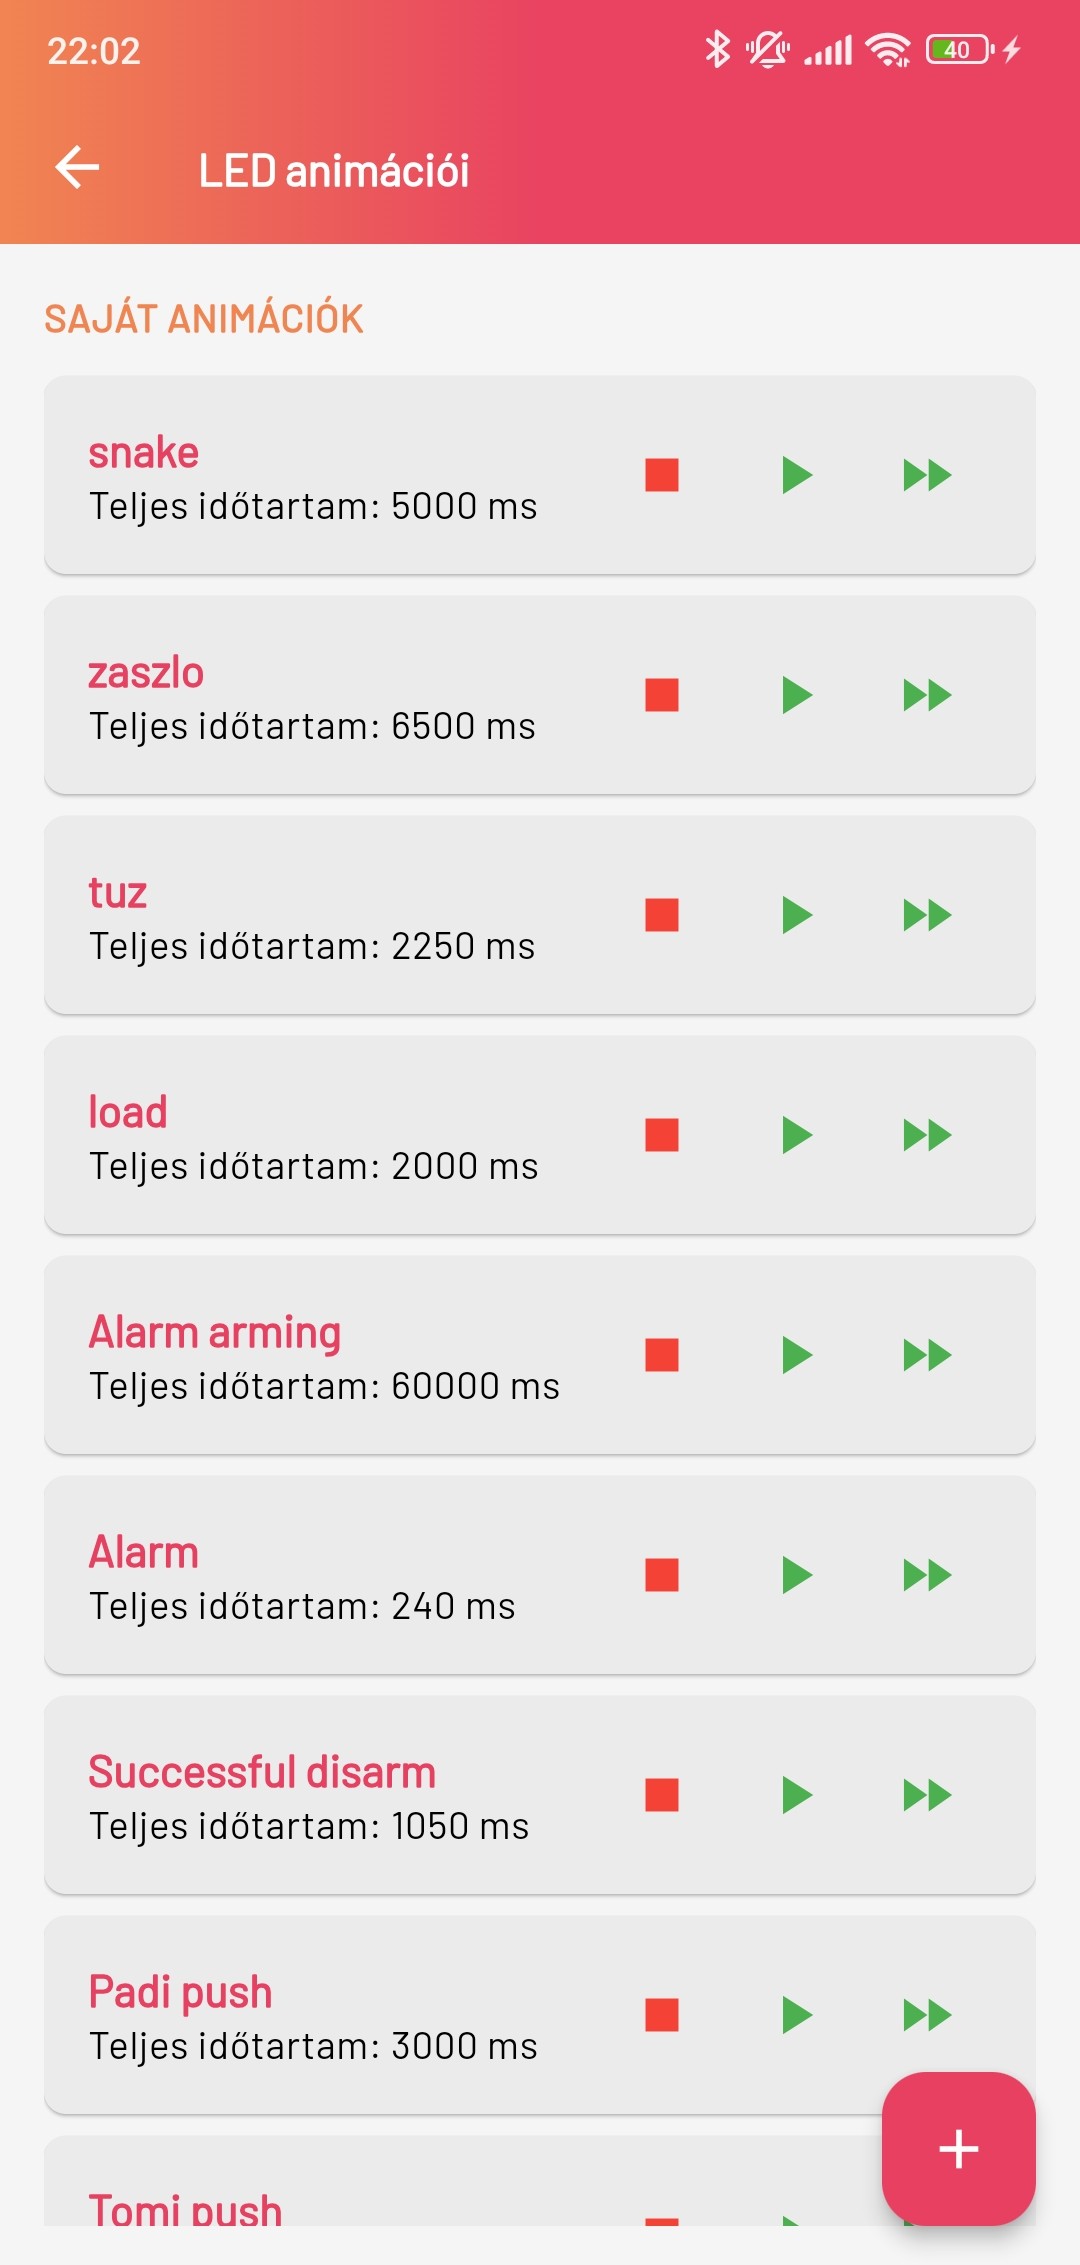
We can create an animation on the LED strip by tapping the Animations button on the LED strip screen. This navigates us to the list of existing animations. On an animation we can see the animation name, duration, and with 3 buttons we can stop it, play it once or play the animation infinitely.
Some are created automatically (e.g. the alarm animations if we create the alarm), but by tapping the + button in the bottom-right corner we can also create a new animation.
Creating an animation
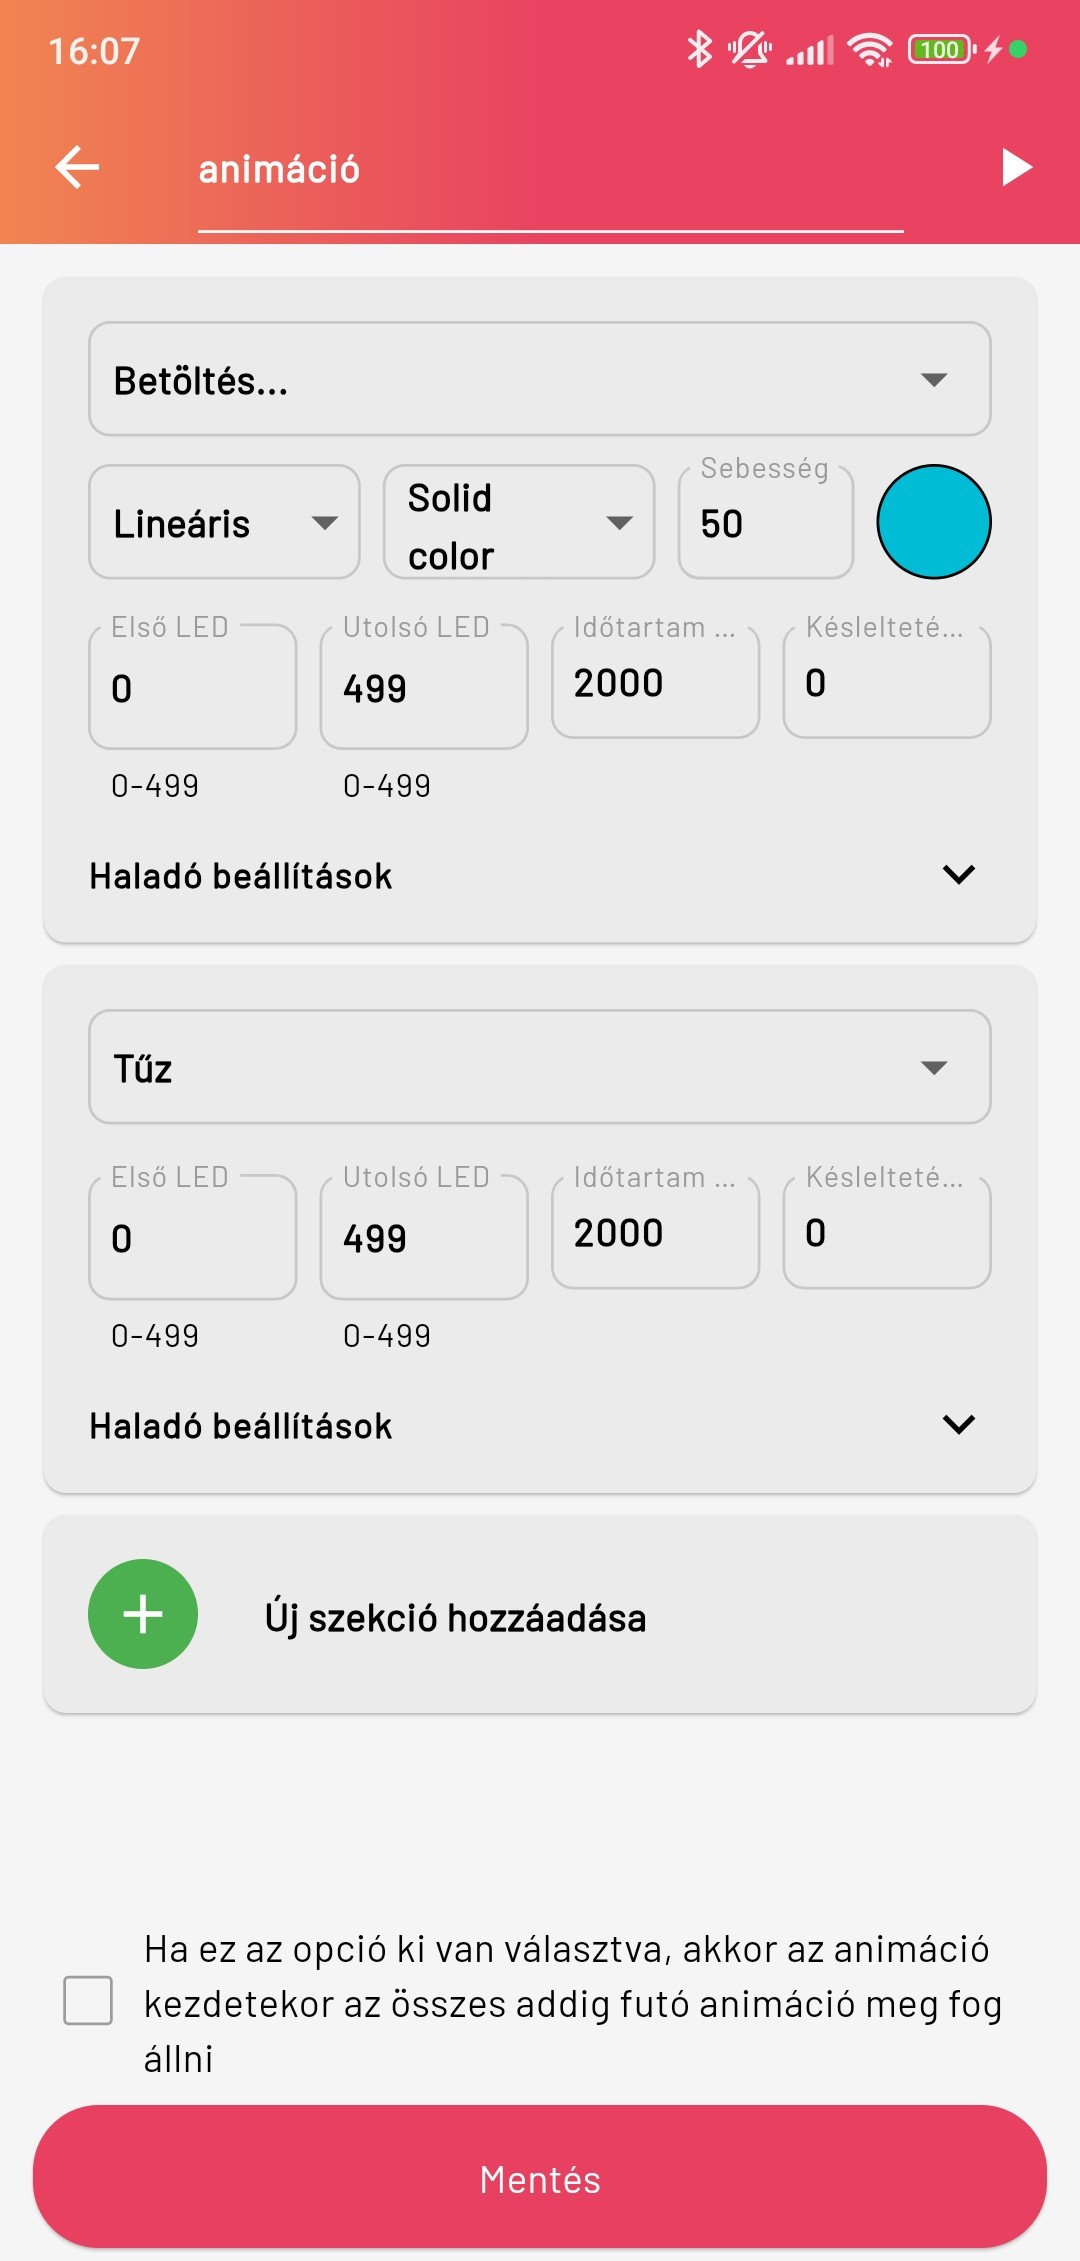
The new animation first needs a name, then by pressing the + Add new section button we can start creating the animation. First we must specify the section animation type, then the light lighting type and the light colour. The Speed sets the movement speed of a multi-colour animation (e.g. Rainbow).
Then we must set how many LEDs of the LED strip the section covers, by setting the start and end LEDs.
In addition we must set the section duration, in milliseconds (ms); this is how long the given section takes to play.
We must also set the delay, also in milliseconds (ms); this is how much time should pass before the section plays. For example, if we want to play two sections in an animation one after the other, on the second section we must set as much delay as the duration of the first section was.
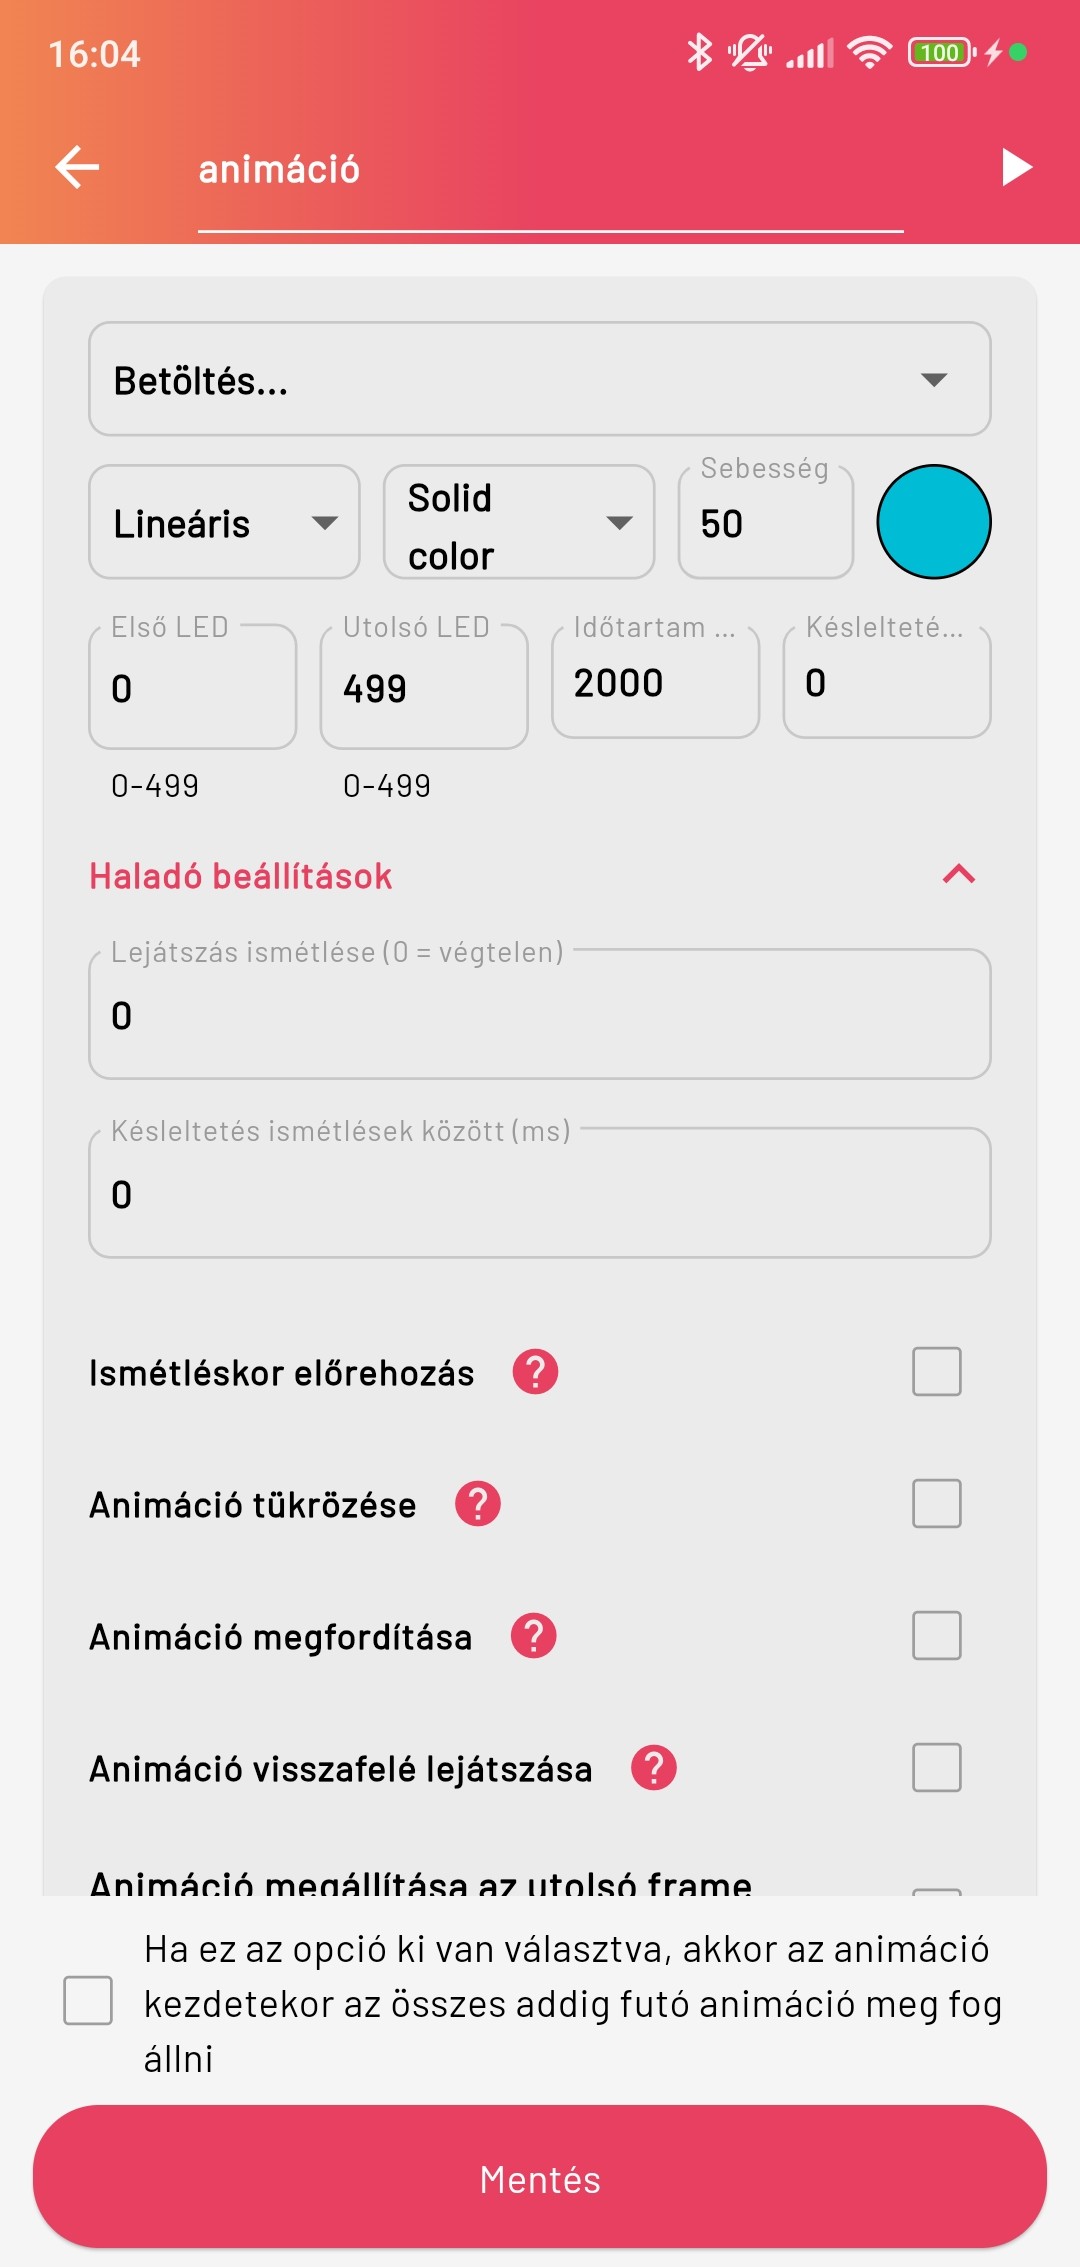
In advanced settings we can also set the repeat count; this is how many times the given section should repeat. If its value is 0, it will repeat infinitely, and we can also set the delay between repeats. Further selectable options:
- Mirror animation: Then the animation plays in both directions starting from the middle of the selected LED range.
- Reverse animation: Then the animation plays starting from the end of the selected LED range.
- Play animation backwards: Then the animation plays backwards in time starting from the end of the selected LED range.
- Stop animation on the last frame: Then after playback the LED strip lights on the last frame, it does not turn off.
After that we can add new sections to the animation and set them in a similar way. In the top-right corner there is a "Play" button with which we can play the animation, for checking.
Another highlighted option is a checkbox above the Save button, with which we can set that when the animation starts, every animation that was active until then should stop.