Adding a new device
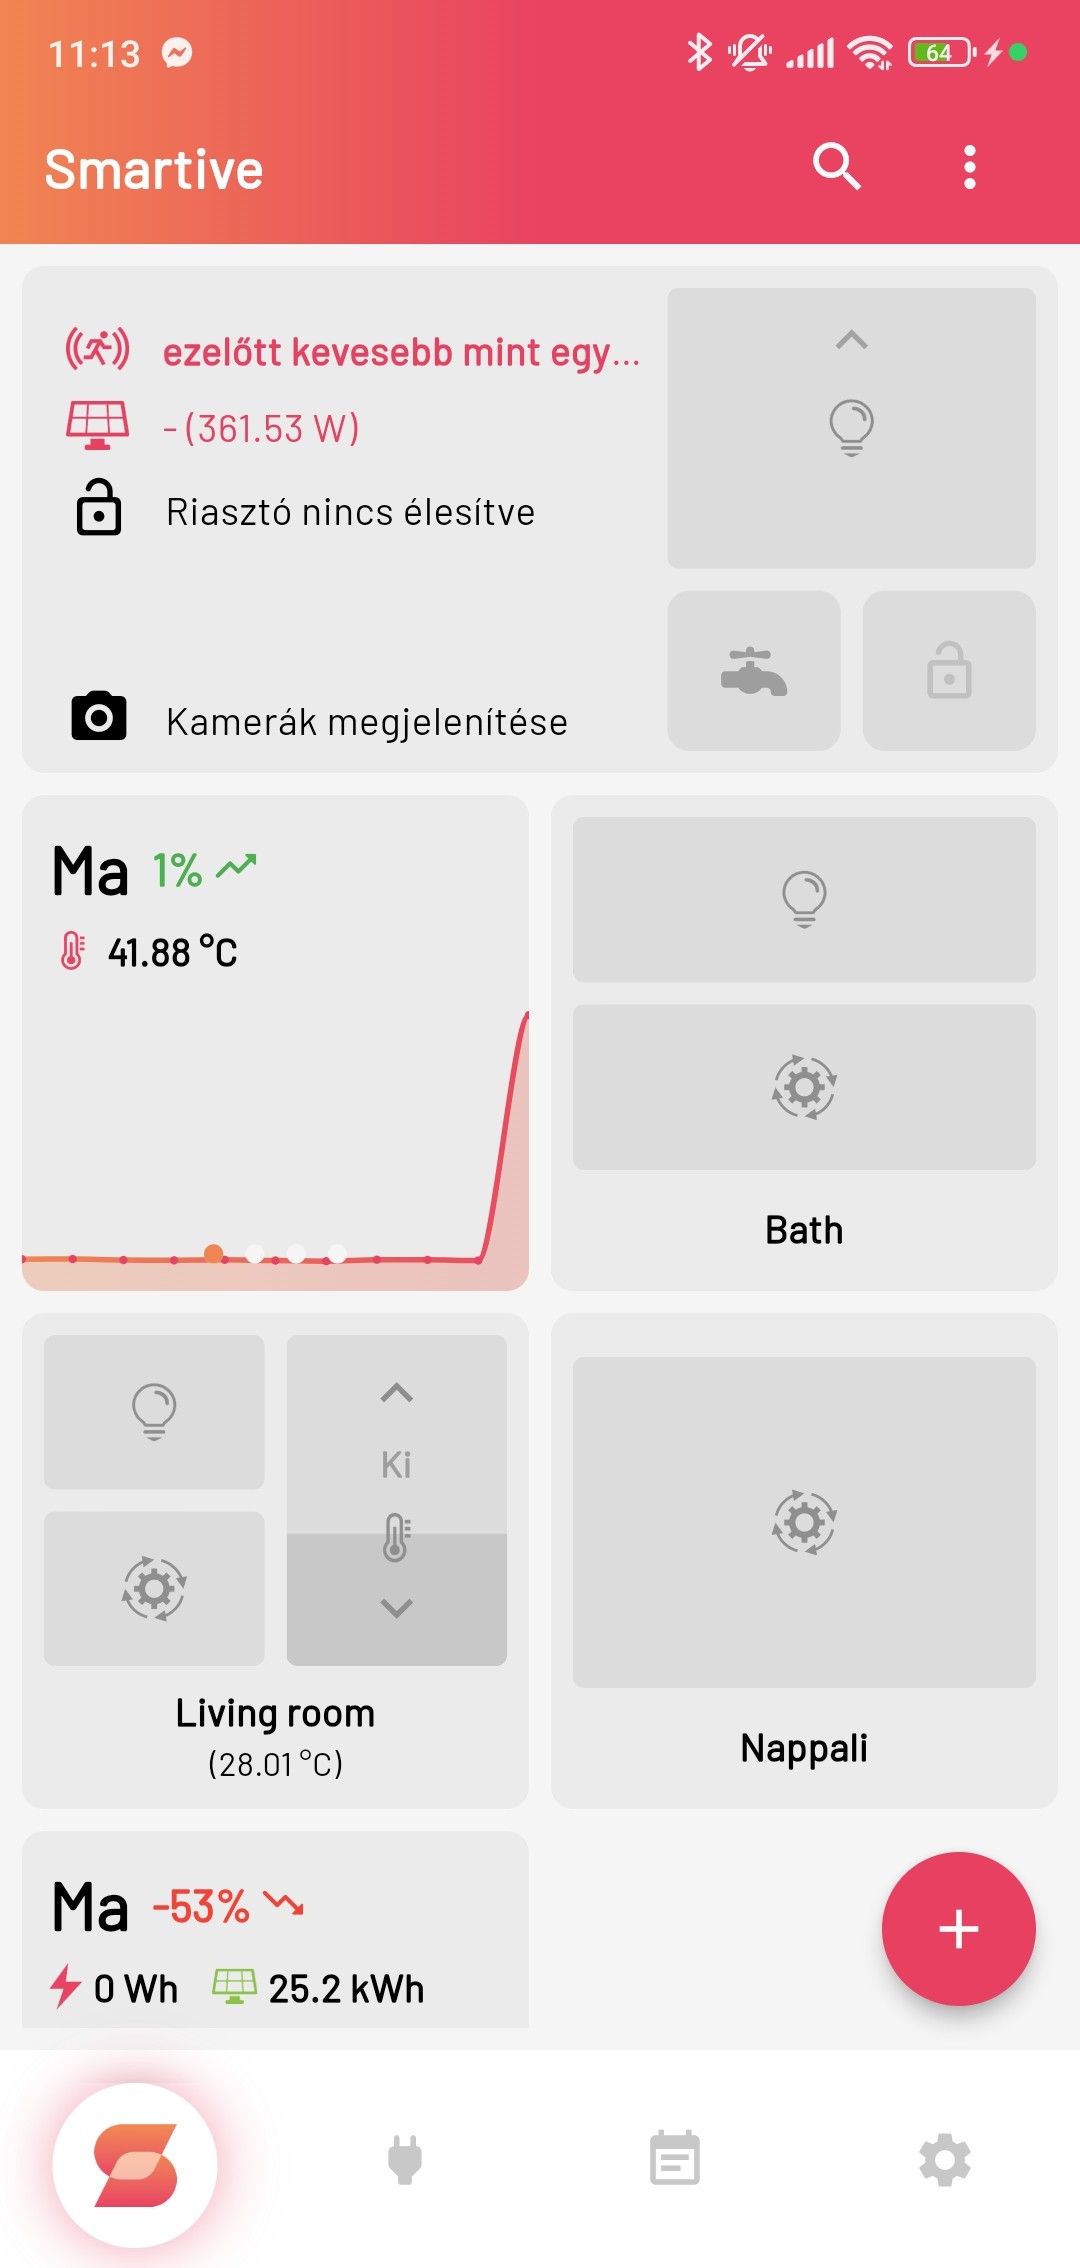
New devices can be assigned in the app to rooms that already exist. You can assign various devices to a room, with which you can control lighting, shutters, temperature and other functions. On the Dashboard you can select the room you need.
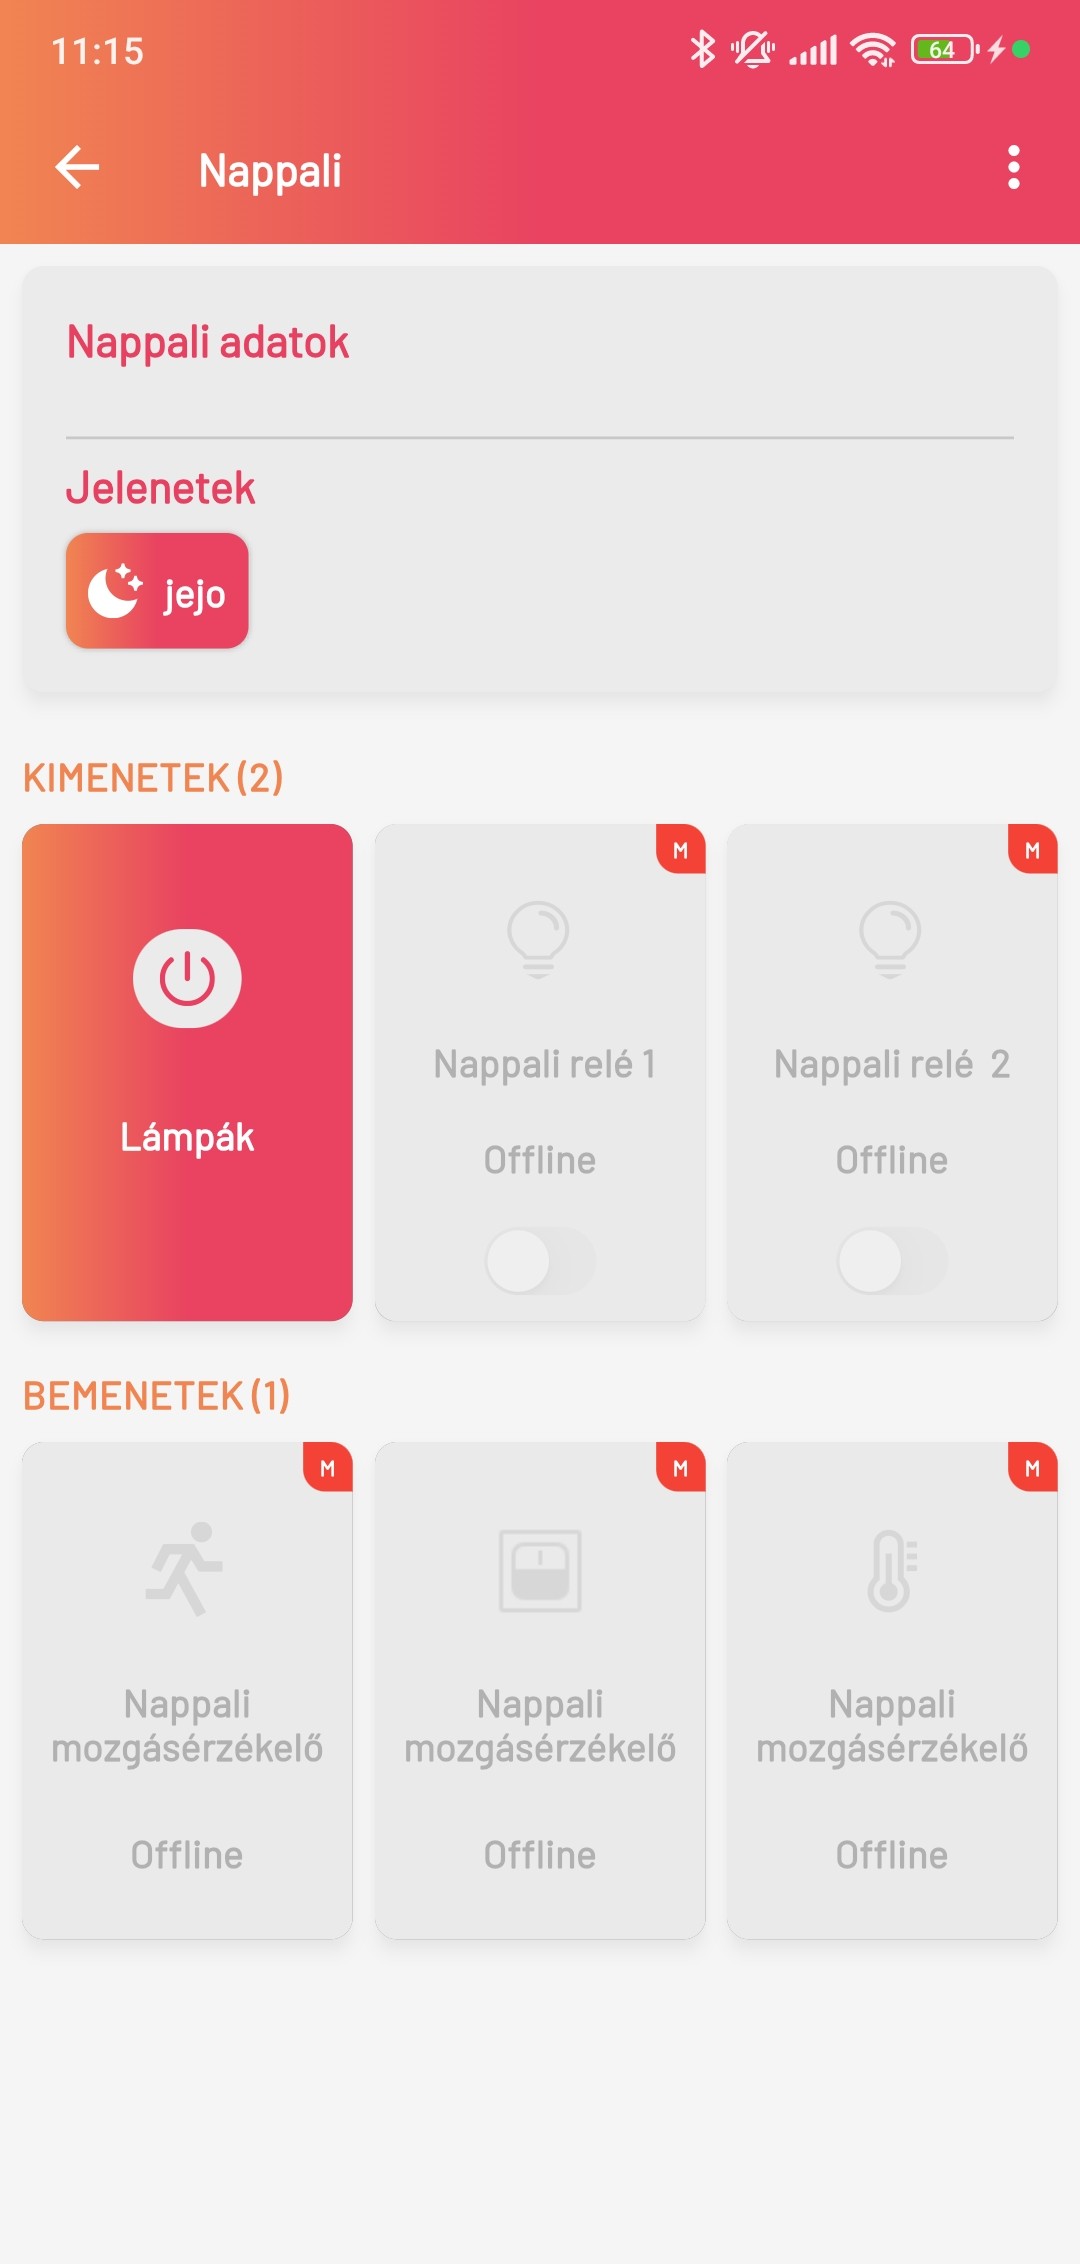
In the selected room you can see the devices already assigned to the room as Outputs and Inputs. Outputs are the devices you can control, such as lighting or shutters. Inputs are the devices that sense the environment, for example temperature or motion, as well as smart switches. In addition you can also see the scenes assigned to the room.
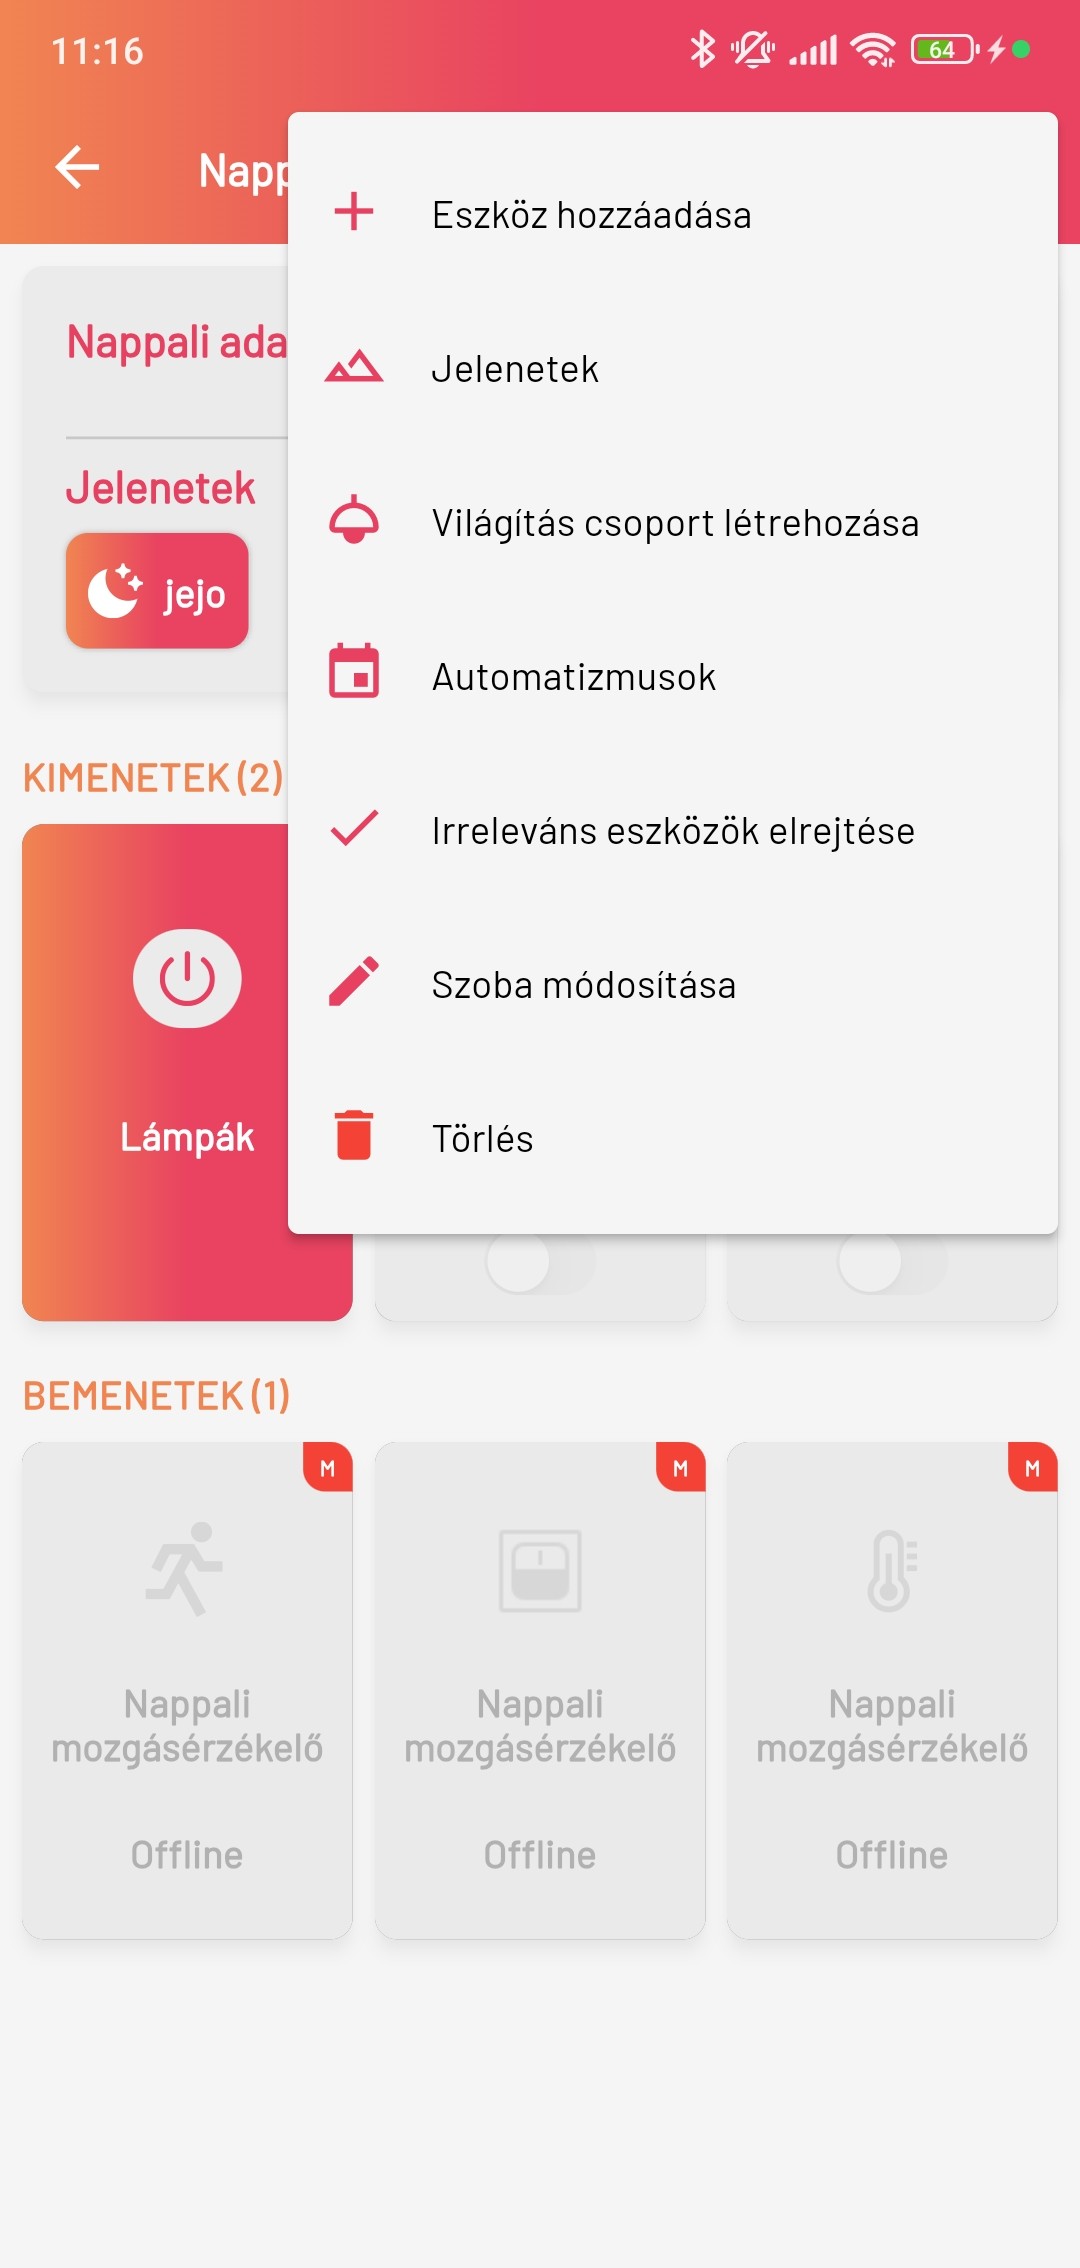
If you want to add a new device, pressing the button in the top-right corner shows a menu; there you need to select the "+ Add device" option.
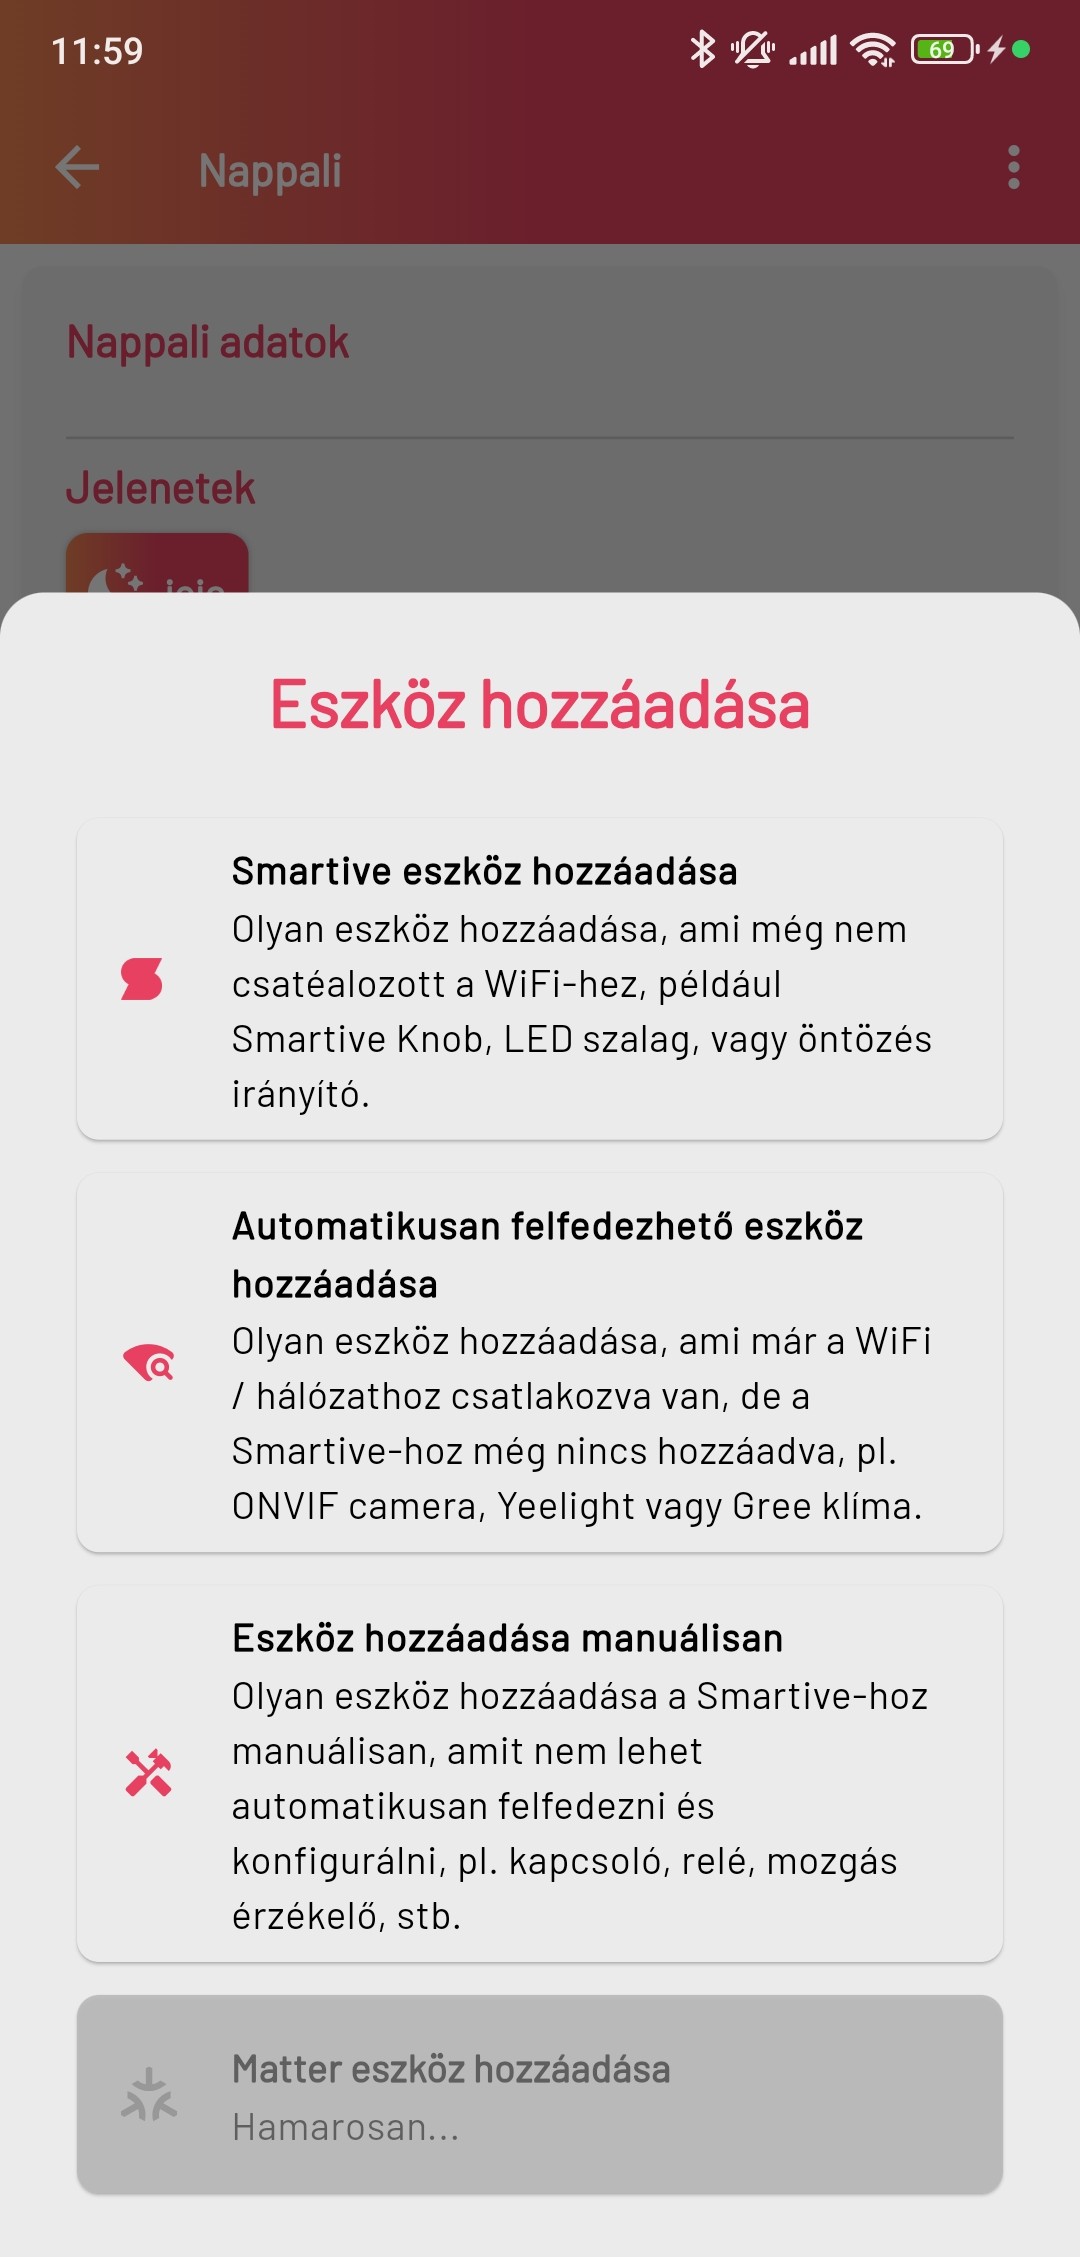
Then a window appears where you can select what type of device you want to add to the room. These can be:
- Smartive device: Adding a device that is not yet connected to Wi-Fi, for example a Smartive Knob, LED strip or irrigation controller. The app discovers these automatically and connects them to the Wi-Fi network.
- Automatically discoverable device: Adding a device that is already connected to the Wi-Fi network but is not yet added to Smartive, e.g. an ONVIF camera, Yeelight or a Gree air conditioner. The app discovers these automatically on the network.
- Add device manually: Adding a device to Smartive manually that cannot be discovered and configured automatically, e.g. a smart switch, relay or motion sensor.
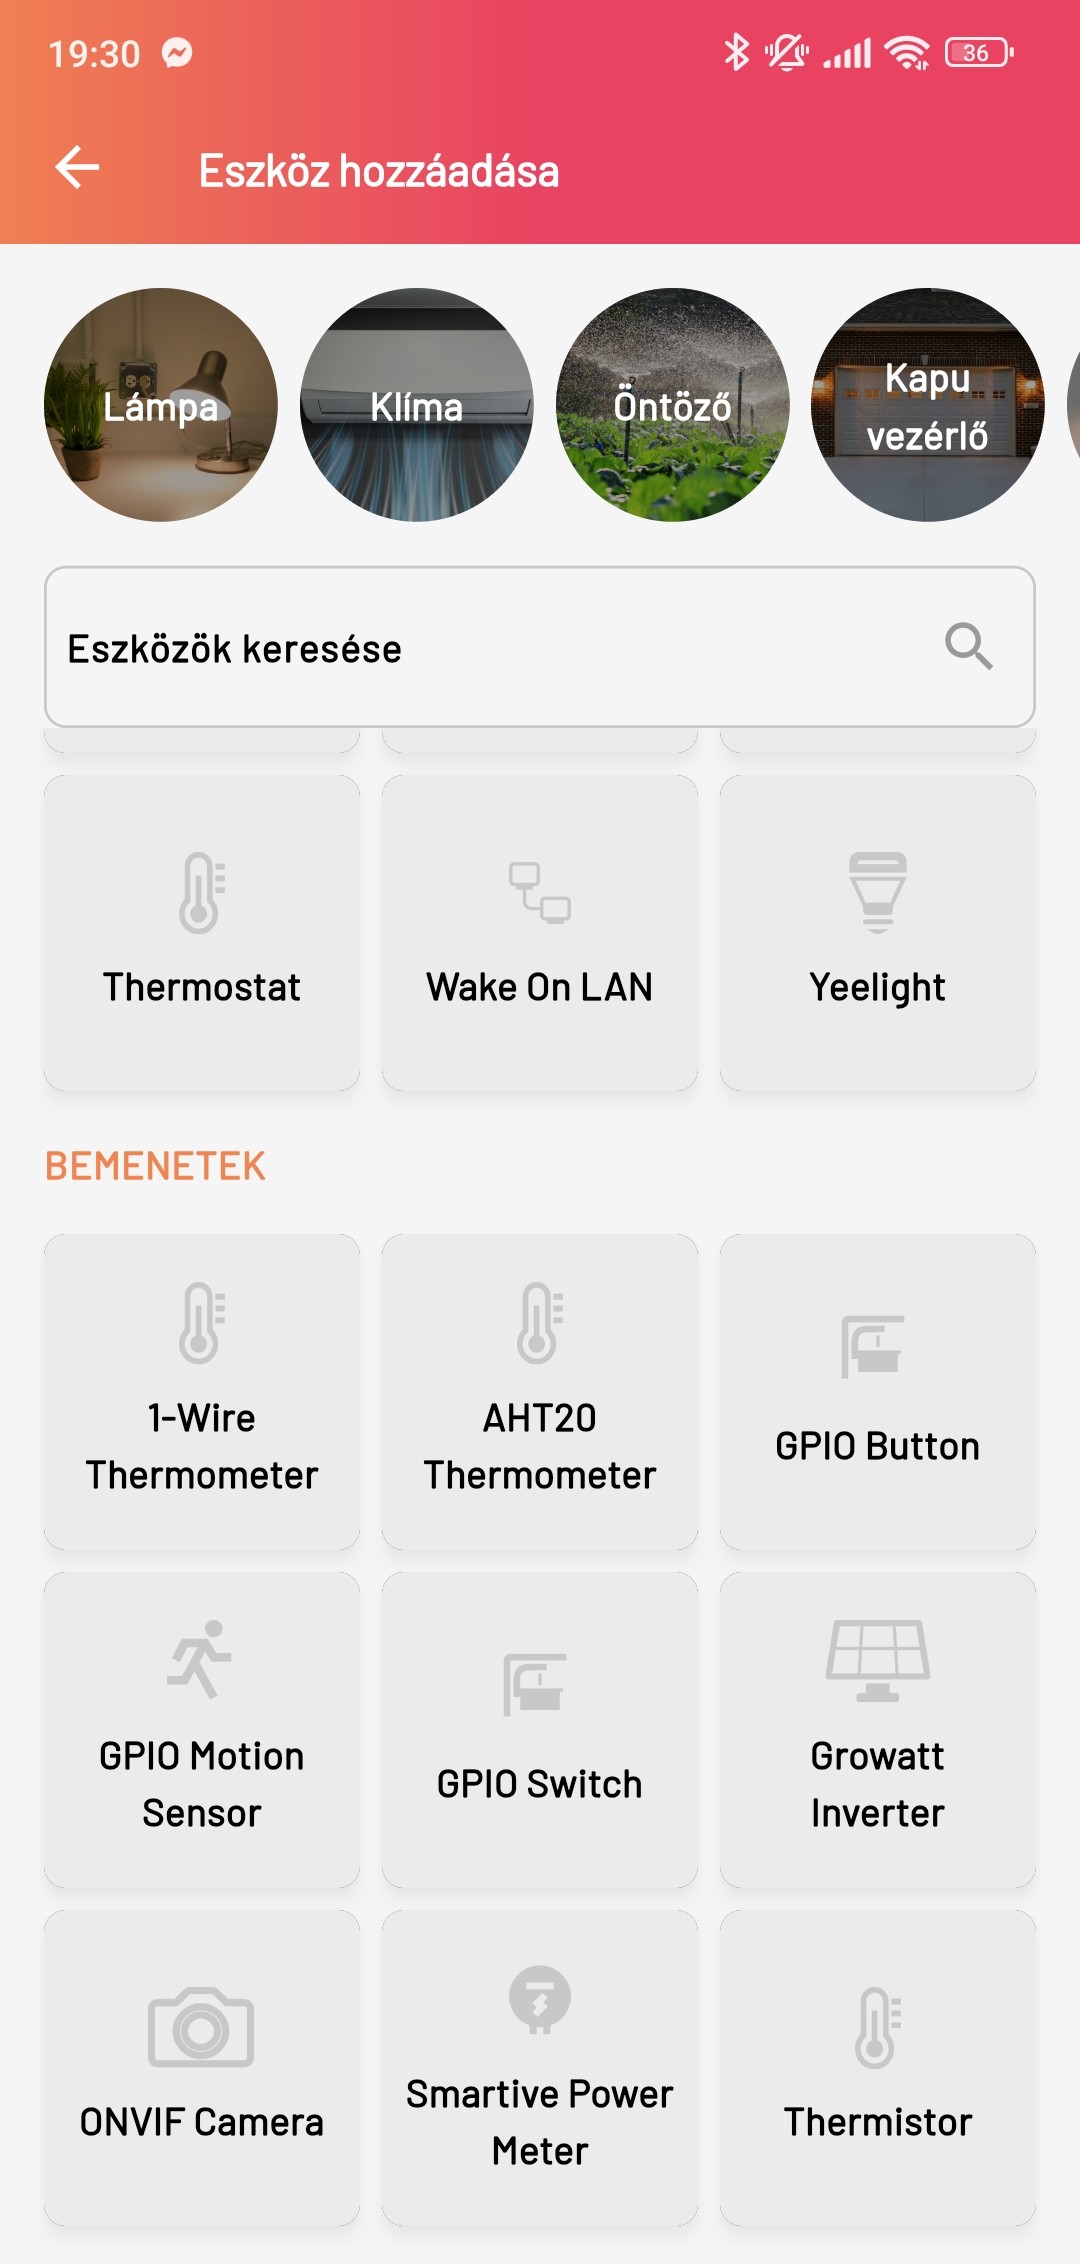
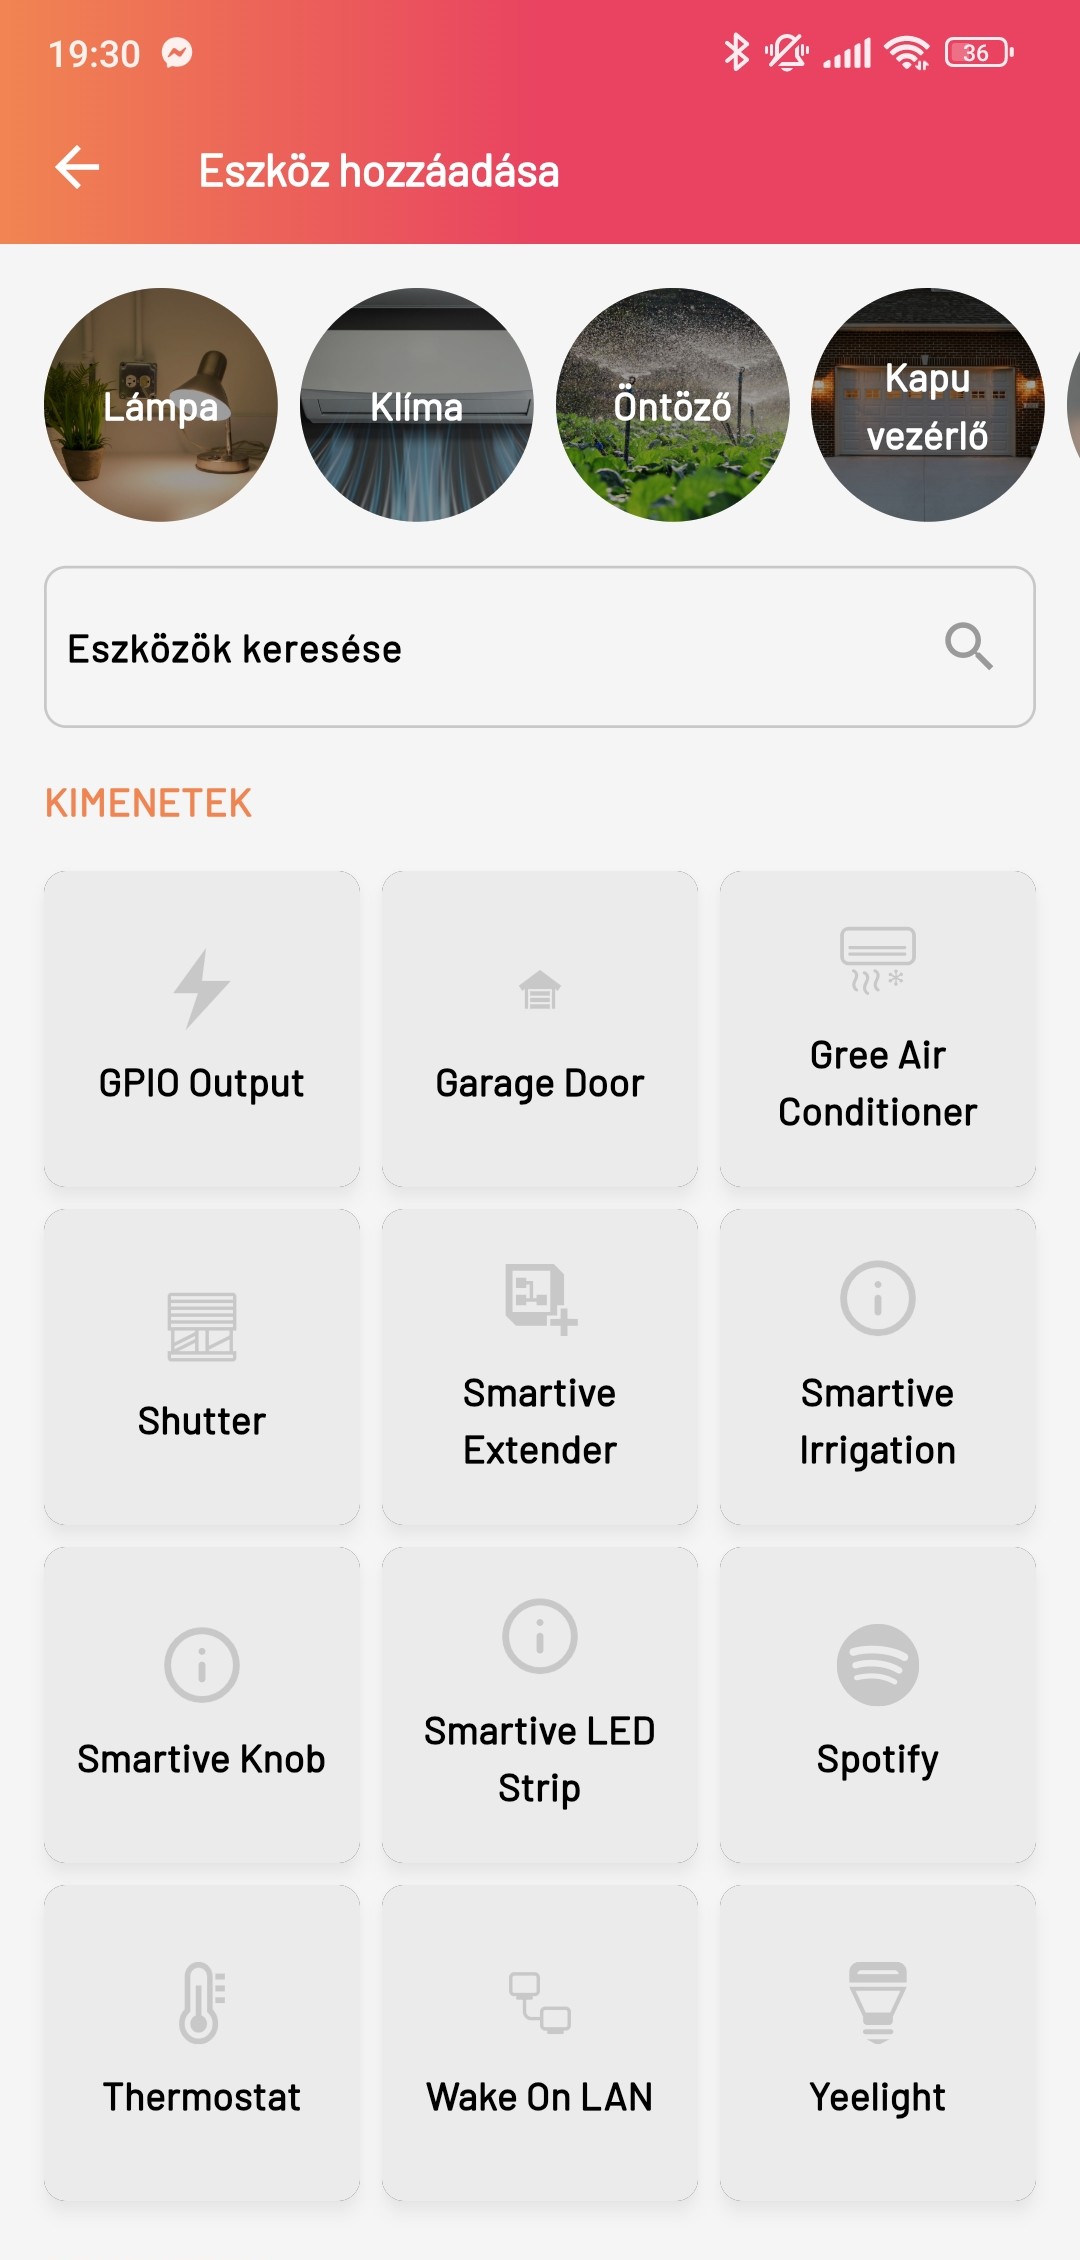
If you choose the Add device manually option, Smartive navigates to a new page where you can select the type of device you want to connect. You can filter them by category, and you can also search for the desired device.
On every device you can set a name, and you can change the room it belongs to (by default the room you originally wanted to assign it to). You can choose from the following devices:
Outputs
On every output you can select manual Auto mode control. While Auto mode is on, only those automations run that have this enabled. If Auto mode is off — for example because of a manual intervention — these automations become inactive, so they are not executed. After 30 minutes of inactivity Auto mode turns back on. You can set this in the Settings menu.
-
GPIO Output: Relay controller. You must select which device you use it for, then the relay number you want to control (Lighting, Gate/Garage, Lock, Socket, Smart window, Heating, Shutter up/down).
- You must specify whether the relay is connected directly on a GPIO port or with an I2C expander
- You must select whether the relay is “on” in the upper or lower position
- As two optional settings you can specify how many minutes at most the device should stay continuously on, and then how long it should stay off (e.g. if you enter 30, it will be on for 30 minutes, then switch off, and you can also specify how many minutes it should then stay off).
- You can specify the device’s exact consumption in Watts if the load switched by the relay has a steady consumption, so the system knows exactly how much energy the device uses. The system calculates total energy consumption from this.
-
Garage Door: Garage door control. You must select a relay that controls the garage door, and you must specify how long the relay operates (in milliseconds, for example 3000 ms = 3 seconds). This must be measured and set precisely so the relay does not run too long or too short.
-
Gree Air Conditioner: Gree air conditioner. After this you must enter the air conditioner’s IP address.
-
Shutter: Shutter control. You must select two relays, one driving downward motion, the other upward. Below these there is a Calibration button, which sets the appropriate time for the relays to operate.
-
Smartive Extender: With this you can add the various Smartive modules to the system, such as the IO module, Relay module, Solid-state relay module , and you must enter the module’s I2C address.
-
Smartive Irrigation: Irrigation system control. You must set the device IP address.
-
Smartive Knob: Smartive Knob control. This is Smartive’s composite Smart switch. It includes a motion sensor, thermometer, speaker and automations can be controlled with a rotary knob. You must set the device IP address and the temperature correction. Then you must set the motion sensor sensitivity on a scale of 100. The smaller the value, the more sensitive it is. You must do the same for the presence sensor, which watches whether something is continuously in front of the sensor. The Knob can perform several functions; to switch between them you press the knob, then within a function you switch by rotating. These are as follows:
- Step scenes: switching between Scenes.
- Control shutter: shutter control.
- Set color: setting lamp colour.
- Light dimmer: setting lamp brightness.
- Set temperature: setting the temperature.
-
Smartive LED Strip: Smartive LED strip control. You must set the device IP address and the LED strip chipset. These can be WS2811, WS2812B, WS2813, WS2815 strips, and you must find the exact colour order ( RGB, RBG, GRB, GBR, BGR, BRG). Then you need to enter the LED strip length, which is the number of LEDs (max. 500). In addition you can limit the maximum power that can be drawn (in milliwatts). If the value is 0, it is not limited, and you can also set whether the strip is in reverse mode. Smartive supports 3 LED strips; you can also make their one-time setup here.
-
Spotify: The Spotify music player app is integrated into Smartive. Here you must log in once to your Spotify account before use.
-
Thermostat: Heating control. You must select the thermostat with which you want to control the heating, then the device that does the heating/cooling, e.g. a Gree air conditioner. Optionally you can also specify a secondary controller. Then you must set the temperature above which heating/cooling turns on.
-
Wake On Lan: This function lets you use Smartive to remotely turn on a computer, smart TV or other device. For this you must enter the device MAC address.
-
Yeelight: Yeelight lamp control. You must set the device IP address.
{primary} By tapping the menu button in the top-right corner of a room you can select an option Create lighting group. Choosing this option lets you group existing light sources so you can control them together. To create the group you first need to give the group a name, then select the light sources you want to put in the group. After the group is created the light sources will operate together, which can simplify lighting control.
Inputs
- 1-Wire Thermometer: 1-Wire thermometer. You must enter the thermometer’s factory 64-bit unique identifier (ID), and the temperature correction.
- AHT20 Thermometer: A thermometer communicating on an I2C port; from a drop-down list you must select the thermometer you want to use.
- GPIO Button: GPIO button. You must specify whether the button is connected directly on a GPIO port to the miniserver or through a Smartive IO module, then you must select whether the relay is “on” in the upper or lower position, and the duration in milliseconds (ms) to wait between detecting two presses.
- GPIO Motion Sensor: GPIO motion sensor. You must specify whether the relay is connected directly on a GPIO port or with an I2C expander, then you must select whether the relay is “on” in the upper or lower position.
- GPIO Switch: GPIO switch. You must specify whether the relay is connected directly on a GPIO port or with an I2C expander, then you must select whether the relay is “on” in the upper or lower position.
- Growatt Inverter: You must enter the username and password used in the Growatt app. As an optional setting, if the system has several solar arrays you can select one that the system will then show; if none is specified it totals all of them.
- ONVIF camera: A network camera supporting the ONVIF standard. You must select the camera the system has already
recognized and enter the host IP address (e.g.
192.168.1.100:8000). As the next step you must enter the camera username and password. Two more addresses must be set:- Snapshot URL: At this address the camera provides an image that refreshes every 5 minutes. If you tap the "Play" button, the live feed loads.
- Stream URI: The live feed is available at this address. If instead of the internal IP address you enter the public IP address (
e.g.
rtsp://<public_ip>:554), the camera will also be reachable over mobile data. Reaching the camera requires port forwarding to be set on the router.
- Smartive Power Meter: Smartive energy meter. From a drop-down list you must select the energy meter you want to use.
- Thermistor: Analog temperature sensor. You need to specify the analog-to-digital converter type, the SPI channel the MCP3008 device is connected to, and the pin of this device that our analog device is connected to. In addition you must also enter the temperature correction.
-
SolarEdge Inverter: If you have a SolarEdge inverter, its production can be tracked. This requires an API key, which can be generated in your SolarEdge account: https://monitoring.solaredge.com/
Steps:
- Log in to your SolarEdge account.
- In the Company Details menu, select the API Access option.
- Accept the terms, then click the Generate API Key button.
- Copy the API key, go to save, then paste it into the Smartive app.
More detailed description: https://knowledge-center.solaredge.com/sites/kc/files/se_monitoring_api.pdf